Tips For a Successful Container Garden
- horticulturist and gardening expertMay 25, 2019
It seems everyone is giving container gardening a try but many find it challenging to keep their containers looking their best. If this is you, don’t worry, you are not alone. I hear these concerns from gardeners across the country. But now’s the time to put aside your fears and increase container gardening success with a few simple strategies and maintenance saving devices.
Start by selecting the best container for you and your plants.
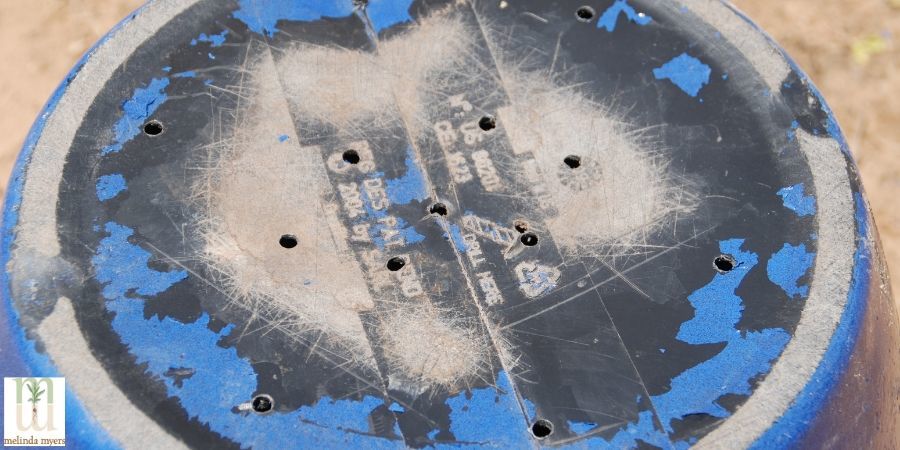
Make sure it is large enough to support the plants you want to grow, fits your landscape design and most importantly has drainage holes. Even if you were able to provide the perfect amount of water throughout the growing season, nature has other plans. Frequent rainstorms and prolonged wet weather can quickly fill a container that lacks drainage holes. The waterlogged soil leads to root rot and plant death.
If you have a container that lacks drainage holes and it is too precious or delicate to add them, try double potting. Plant your garden in a slightly smaller pot that does have drainage holes. Place a few stones in the bottom of the decorative pot and set the smaller container inside on the stones. Excess water collects in the stones below the inner pot. Just check occasionally and empty excess water before it reaches the bottom of the inner pot.
And don’t use rocks to provide drainage in a pot that lacks drainage holes. This doesn’t work. Each time you water or it rains the excess collects in the stones. Eventually, the water overflows, the soil becomes waterlogged and plants begin to decline and eventually die.
Extend the time between watering with self-watering containers. Just keep water in the reservoir so the soil can consistently absorb the water your plants need. Select self-watering pots with weep holes that allow excess water to escape rather over saturate the soil.
Consider the weight, porosity and weather resistance of the material when selecting a container.
Porous materials like terra cotta dry out quickly and are perfect for wetter climates and gardeners that tend to overwater. These do not tolerate freezing temperatures and need to be stored indoors where winters are cold.
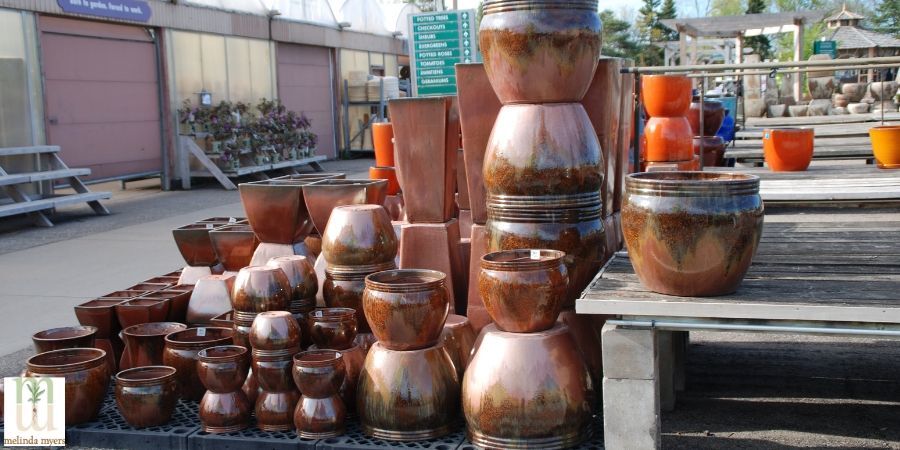
Glazed ceramic pots do not dry out as quickly as terra cotta. They are also heavy reducing the risk of tall plants blowing over in the wind. Like terra cotta, they benefit from being moved indoors during cold winters.
Plastic pots are lightweight, hold moisture longer and come in a variety of sizes, shapes, and colors. They are somewhat tolerant of cold winters. I have success overwintering plants outside in plastic pots. The color fades and cracks after several cold winters in Wisconsin. But by then I find it is time to move the plants to a larger container. Just avoid hitting the frozen plastic pots with your snow shovel or it will crack.
Fiberglass pots now come in a wide range of colors and designs. These lightweight pots generally tolerate temperature extremes allowing even northern gardeners to keep them outdoors year round.
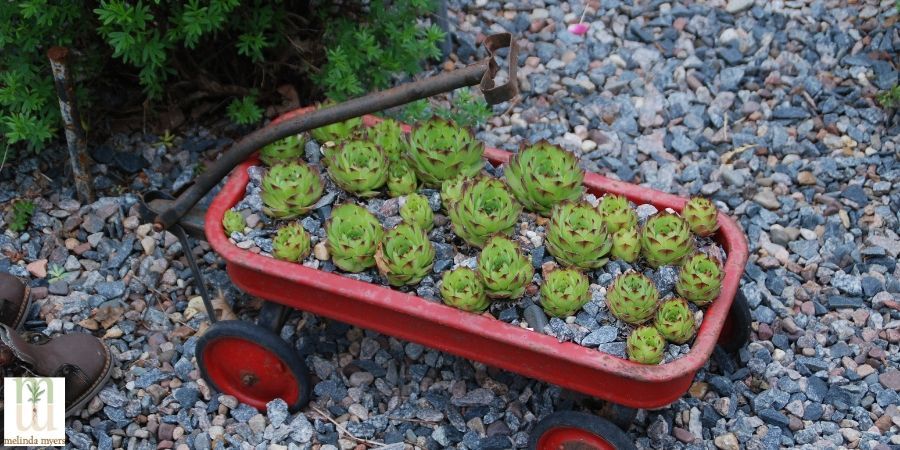
Using found items as containers is a fun way to add a bit of history and whimsy to the landscape. It’s also a wonderful way to preserve memories by turning a child’s wagon or father’s work boots into a container. Just make sure they are plant friendly and add drainage holes or double pot as needed.
Choosing Potting Mix
Use a potting mix that provides adequate drainage while holding moisture and nutrients the plant needs. I use to make my own potting mix by combining compost, vermiculite or perlite and topsoil. But as it became harder to find quality ingredients I started buying potting mix. Find one that works for you and is consistent from bag to bag; it will make maintenance easier. Try several potting mix brands until you find the best product for your gardening style.
I am often asked if it's necessary to change the potting mix for annual containers from one year to the next. I do. It is the best way to reduce the risk of disease. With a relatively short growing season, I want to make sure everything toward success. If you chose not to change out the potting mix each year do freshen things up a bit. here are some things to consider. Remove the dead annuals and add about 50% new potting mix to your planter. If your container planting suffered from a disease or insect pest the previous season, make the change. Disinfect the container in a one-part bleach to nine parts water solution for 10 minutes. Then wash and rinse with clear water before planting. Fill with fresh potting mix and plant.
Many gardeners like to save money spent on potting mix or minimize the weight by creating a false bottom in larger containers. They fill the bottom with small cell packs, water bottles, or just about anything to fill the space. If this is you, cover these items with landscape fabric before adding the potting mix. The fabric lets air and water through but prevents the potting mix from filtering through these materials and lowering the soil level in the pot. You can purchase products that create a false bottom, prevent soil settling and maintain drainage
Keep in mind the more potting mix in the container the more moisture and nutrients it can hold. This means less frequent watering is needed.
Select plants that thrive in the sunlight, wind and other growing conditions.
Make sure all the plants combined in one container require the same soil moisture.
Watering is often the biggest challenge. Containers need to be checked daily and watered thoroughly when the top few inches of soil are crumbly and starting to dry. Small pots may need to be watered twice a day when the weather is hot and dry. Succulents and drought tolerant plants prefer a bit drier soil, but still, need to be checked daily. Let soil moisture, not the calendar be your guide
Self-watering pots, mulch, watering devices, and irrigation systems can help reduce maintenance and increase your growing success. Mulch newly planted containers with shredded leaves or evergreen needles. This help conserve moisture until the plants grow and cover the soil surface.
Watering spikes attached to water-filled wine and soda bottles allow water to slowly infiltrate the soil extending the time between watering. This works well for a long weekend or those with a busy schedule. Just monitor and adjust your watering schedule for changes in the weather and as plants mature and require more water.
Utilize a drip irrigation system and a timer to automate watering. You will find an array of DIY systems that are easy to install. Just check often to make sure the water emitters haven’t been knocked out of the containers by squirrels, chipmunks or the wind.
Skip the polymer crystals that absorb water and are supposed to make it available for the plants. Research shows they are not effective. If you decide to give them a try, read and follow label directions. Adding more can result in soggy soil and root rot.
Fertilize Your Container Plants.
Further, reduce ongoing maintenance by using Milorganite a slow-release fertilizer at planting. Just work the recommended rate into the top inch of soil. Small amounts of nutrients will be released over the next 6 to 8 weeks. No weekly mixing and applications needed. Plus it won’t burn tender transplants or plantings when the weather turns hot and dry.
Make additional applications of Milorganite as needed about every 6 to 8 weeks. The low nitrogen promotes slow steady growth that is less susceptible to insects, disease and drought stress. The non-leaching phosphorus helps promote flowering and fruiting.
Here are a few more tips and tricks to boost your container gardening enjoyment and success:
- Fill large pots with potting mix and plants where you want them displayed. Once large containers are fully planted they can be quite heavy and difficult to move. Set larger containers on wheeled plant caddies if you do need to move them out of the way or into the sun on a regular basis.
- Utilize a pot lifter when setting planters in place or moving them indoors for winter. The straps adjust to the container and the pair of handles allows two people to move the container. This device is helpful even when you do the job yourself. I find some large pots are hard to grip and carry. The pot lifter handles allow me to wrangle these pots alone.
- Use pot feet or other surface saving devices to elevate containers above the patio or deck surface. These allow the containers to drain freely and reduce mold and discoloration of the surface below.
- Those of us growing perennials, trees, and shrubs in pots in cold climates may need to provide some extra winter protection. Plants in large weatherproof containers that are at least one zone hardier than your hardiness zone will usually survive.
- For smaller pots and more delicate plants, you will need to provide additional winter protection. The easiest method is to sink the pot of hardy plants into the soil in a vacant space in the garden. The soil provides the needed insulation. Then lift the pot in spring for the start of the next season.
- Or gather your containers together in a sheltered location. I surround mine with pots of annuals, they’re dead and waiting for a trip to the compost pile, but in the meantime provide needed insulation for the roots. I cover all the pots with snow. You can also move some into an unheated garage. Place on a board for added insulation. Group plants together and water whenever the soil is thawed and dry. Or throw a scoop of deicing salt-free snow on each pot. As temperatures warm the snow melts and waters the plants.
- Non-hardy plants need to move inside for winter. Grow these like houseplants or let them die quickly with the first killing frost. Add them to the compost pile and look at it as an opportunity to try something new next season.

So find a few cool containers, beautiful flowers, and tasty vegetables and get busy growing. Once you fine-tune your container gardening skills, the only challenge left will be your budget.